Have you recently started using git? Or using it for a long time but still have the feeling you are missing something or not able to relate the concepts. So, here you will boost up yourself and become a power user in git.................!!!

What is Git ?
Git is a Distributed Revision Control System.
In order to make it more easier to understand, we can break Git as :
- Distributed
- Revision
- Control
- System
Types of Command :
Git has two types of Command:
- Porcelain Commands (High level commands):
Things with which the user interacts and gets work done.
$ git help -a` *Shows the main porcelain commands
git add
git commit
git push
git pull
git branch
git checkout
git merge
git rebase ...
- Plumbing Commands (Low level Commands):
Things which git uses internally to get things done.
git cat-file
git hash-objects
git count-objects ...
If you are wondering why I have mentioned the commands and its type, then you need to wait as it will make more sense when you read the rest of the blog.
If you want to understand Git, don't focus on learning the commands. Instead learn the model. So to have effective understanding, imagine that git is a model layered like the Earth's structure as shown below.
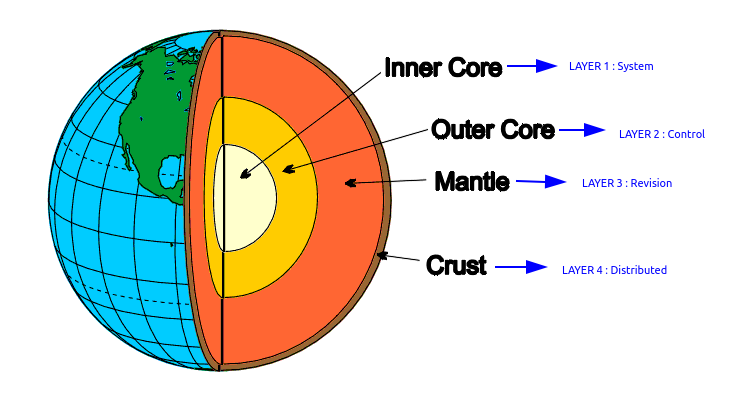
Assuming that Git is structured like Earth's structure because even in Git, there are four layers similar to four layers of Earths that is
- LAYER 1 : System
- LAYER 2 : Control
- LAYER 3 : Revision
- LAYER 4 : Distributed
In this blog we will talk about Earth's structure inside out, that is we will begin digging from the inner layer and will reach the crust having explained all the four layers of Git. So let's understand each layer thoroughly.
Layer 1 : System
In this section, we will understand how git at core is just a map. This means that it's a table with keys and Values where Values are any sequence of Bytes
When a sequence of values are passed in Git, it generates a key(hash) for it. Every value has its own hash which are calculated using “SHA1 algorithm" and we know that SHA1 hashes are always unique.
So, in the image below we find the hash of string badminton. In this "Badminton" is a value and "f50df...fa1" is key(hash) for it. A sample command is shown below
echo "Badminton" | git hash-object --stdi
We echo the Badminton and pipe(|) the result into a git plumbing command called hash-object and also tell the hash-object to get its result from stdin(standard input or getting direct input instead from a file).

Every Hash is a key and it has a value which can be decoded and read using another plumbing command called git cat-file. When we decode a hash, we get objects which are explained below.
Git objects are present in .git/objects. Git has four types of objects: blobs, trees, commits and tags.
BLOB: Any arbitrary file having plain text or any type of content is called blob.TREES: Equivalent of directories i.e. a tree is a directory stored in Git.COMMITS: A commit holds metadata for each commit into the repository including the author, committer, commit date and log message.ANNOTATED TAG: A name which is assigned to a commit. It's difficult to remember a commit hash, so we provide a name to hash just like a Domain name to IP.
Let's see where the hashes are stored.
Lets understand how and where git stores the hash values. Taking example of Badminton again as explained above
First initialize the git repository by using the command
$ git init
So in the below image it shows the hash value of Badminton is stored here in the .git/objects/f5 repository.
Note You will notice directories inside .git/objects and their names starting with 2 letters as shown below f5. Git uses the first two letters of the hash and makes a directory out of it and the rest of the hash is stored in it as it is.

In the below image the command
$ git cat-file f50dfa851f76f8d7e89660e40cc0bdc34ee77fa1 -t
Note:
t : gives the file type in which the hash is stored
cat-file : It is a plumbing command which reads the data inside.
$ git cat-file f50dfa851f76f8d7e89660e40cc0bdc34ee77fa1 -p
p : It is called pretty print as it prints the data inside the objects

As it got stored in the form of a blob. So we can track in the above example where our information is saved hence a map is formed or we can say persistent map.
Here we finished with the first layer of git that is the system and also got the idea of keys and values. Moving further we come to the second layer of our model.
Layer 2: Control
Content tracker
We have seen till now that git is a persistent map but we see it as something probably more than that something that tracks your files and your directories as a content tracker. Lets see what that means:
We will now take a very simple example sportslist
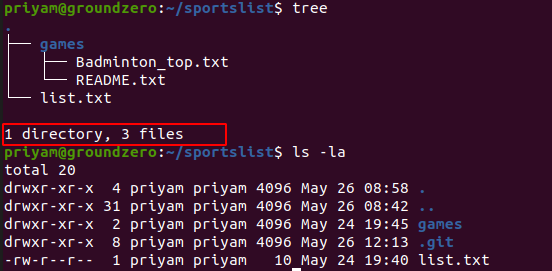
As in the above image, we can see there is one directory(games) and 3 files(Badminton_top.txt, README.txt, list.txt) contained in the sportslist directory.
Now we initialize Git as we earlier did in Layer 1
$ git init

When we check our object directory under .Git, it is empty we find nothing other then info and pack subdirectories means nothing is stored over here.

First Commit
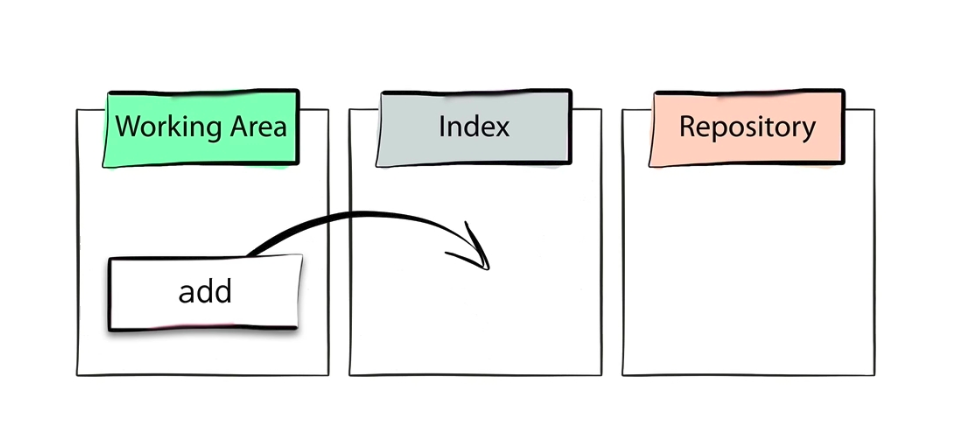
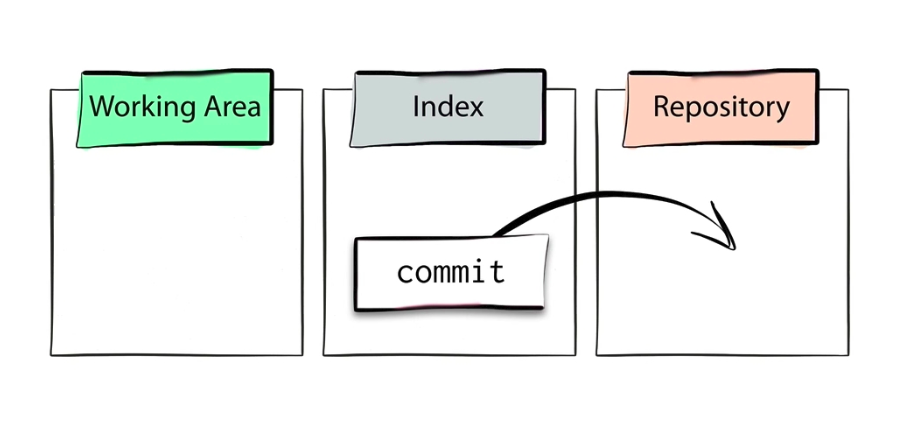
Let's do the first c!ommit in our sportslist example, before doing the commit we first need to add all changed files to the staging area. Whatever is in the staging will get into the repository after the commit.
In order to check the status of files, we use
$ git status

In the above picture, files are untracked meaning they are not in the staging area.
Notes : I will talk more about staging and three other areas which are very important to understand in order to understand git at the end of blog
So for adding to staging area use the below command
$ git add
or
$ git add list.txt detail` // To also add/pass single file

To check whether they are staged or not again use the status command.
$ git status

In the above image it shows files and folders under "Changes to be committed" in Green means they are properly staged.
Now in order to commit :
$ git commit -m "first commit!"

So to check logs in order to see, which hash is of the commit we did and the commit message, the author, date and time also. From there we can find the hash of all the files and folders which we committed.
In order to see logs, we use command
$ git log

Where first commit got stored
So to find where the first commit got stored we will go to .git/objects. You will find the following object directories as shown in image below which were empty as I discussed earlier.

The starting 2 letters of hash in the commit message which is c88887....c0 i.e, c8. There is a directory present in .git/objects with the same 2 letters.
On opening this directory, we will find a hash. Lets see what is inside this hash.
git cat-file -p c88887
-p stand for pretty print

This hash contains metadata about the commit.
Coming further on Tree hash and see what it contains.

In above image we see there is Tree hash showing the games directory and blob hash showing the list.txt file we made in the beginning in the sportslist directory.
This is the way we can track the data which is stored inside the git repository.
This is how git does tracking and that's why we call it tracking or control system.
Now, we move further in our blog and know about the third layer of Git and features that result into a revision control system, features like branches and merges.
Layer 3 : Revision
BRANCH
So branches are actually just a reference to a commit and our default branch is the master branch shown in the image below.

One can create new branch using below command
$ git branch him
To see all the branches in your current repository type
$ git branch

The branch marked with ashtrick '*' is the current branch.
In above image we see we have two branches that is master branch and him branch.
Let's find the commit hash of the two branches in order to verify my above statement that branches are actually a reference to a commit message
$ cat .git/refs/heads/master
--
$ cat .git/refs/heads/him

Both the 'master' branch and new branch 'him' have the same commit because they are pointing to the same commit c888873...1ac0.
What is head
Head is a reference to current branch and another way to find current branch is to read the HEAD file under .git.
$ cat .git/HEAD

So in above image head is pointing to the master branch.
Now for changing the current branch.
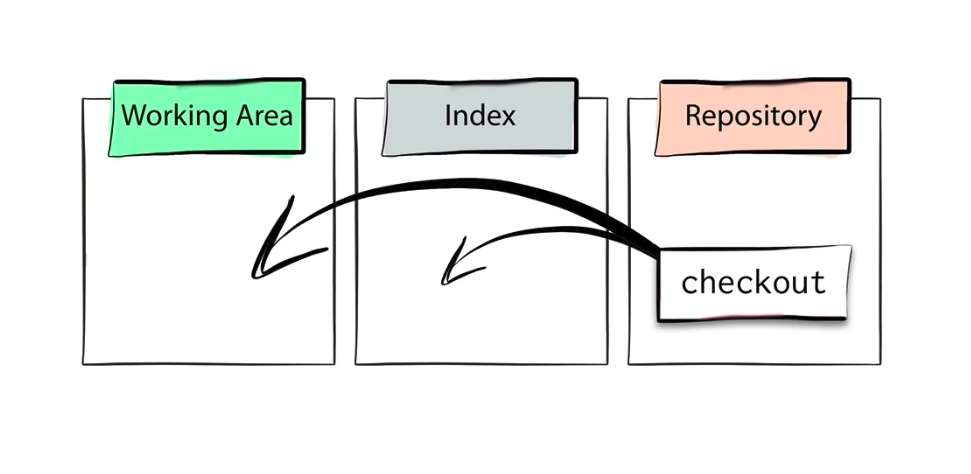
Checkout actually moves the head and changes the working area.
$ git checkout him

So, in the above image checkout switched to branch him and also head is now pointing at him branch.
Merging of Branches
Merging of branches is one of the important features offered by git. Merging allows a user to merge two different branches into one. Every branch has its own data, once the merging is done the branch become similar. Follow below example for merging two branches and comparing the data.
To merge two branches, we can merge the data and compare it. Over here we will compare master and him* data we use the command:
$ git merge him

In this conflict occurs as him and the master branch have different data so now to merge we have to solve this conflict.

The conflict can we solved in 4 ways which are:
- Accept Current Change - means to keep content of
master branch and ignore him branch
- Accept Incoming Change - means to keep content of
him branch and ignore master branch
- Accept Both Changes - To keep both the changes(master's content and him's content)
- Compare Changes -Just to compare changes in both branches simultaneously.

Hence, the two branches got merged successfully as it has now new tree and two parents now one is master branch and other is him branch.
So, we have covered the third section of our model that is Revision with the understanding of features of git that are branches and merging of it. Moving further towards the Layer 4 of our model.
Layer 4: Distributed
Here we come to our last and final layer that is a distributed layer which is useful for connecting us to other people working remotely. Distributed itself means between more than one or two people. We can work in using distributedly by using platforms like github, gitlab, bitbucket.
To do the same, go to github/gitlab/bitbucket and make a new repository.

Now as we have our repository already on our local machine, so choose the second option command as shown in above image that is:
$ git remote add origin https://github.com/Priyam5/sportslist.git
Now that we have added origin where we need to push our project file sportslist. The git push command is used to push the commit to remote repository. The command used for pushing to GitHub is given below.
$ git push -u origin master
Here -u, means that next time you don't have to specify name(origin) and branch(master) again.
When we are required to update the local repo based on someone else's changes done on the remote repo. We use command
$ git pull
It will pull the changes from remote repo and will update the local repository
So, we have completed our 4 Layers of git.
While writing the blog I figured that it is important to understand the four areas in git which I will be writing in my upcoming post over git
Thank You for reading.






![]()
![]()


